Showing posts with label recipe. Show all posts

Tuesday, June 1, 2010

Hold the Mayo

Just before we lost egg, I'd made some amazing homemade mayo with balsamic vinegar...I took one taste & swore I'd never get store-bought again! I suppose that was a prophetic statement, in a way, since it has been tough impossible to find a top 8-free mayonnaise. Not exactly what I meant.

I'm not a big mayo eater (though I seriously might have become one for the homemade stuff) so I haven't missed it that much. But my toddler does love a sandwich (mostly for the bread, I think) and since GF breads tend to be dry/crumbly, it seems like mayo might be useful there.

Anyway. Here are two recipes (I must confess that I have not made either one...am just posting here because I'm posting it to my favorite allergy group and figured I might as well plop it on here as well) that might fit the bill for your family. I'd love to hear feedback!

Beannaise

1 3/4 cup drained cooked or canned white beans (one 15 or 16 oz can)
2 Tbs fresh lemon juice
1 Tbs white wine vinegar or additional fresh lemon juice
1/2 tsp salt
1/4 tsp dry mustard
1/3 cup EVOO
1/3 cup organic canola or safflower oil

Put all of the ingredients except for the oils into a blender or food processor with s-blade. (Blender will yield a smoother result.) Blend or process until creamy. With appliance running, slowly & steadily add the oils. Stop machine and scrape down sides as needed; process to desired smoothness. Refrigerate to chill & blend flavors.

Cover tightly and store in refrigerator. Will keep about a week. Can also be frozen.

Avocado Mayonnaise
Yield: ¾ cup (177 ml)
This blend can be used as a sandwich spread, salad dressing or to boost flavor of potato or bean salads.

1 medium or large avocado
juice of 1/2 lemon
1/4 tsp salt or to taste
pinch of cayenne pepper
1/4 cup (59 ml) expeller pressed vegetable oil

Remove pit from avocado; scoop out flesh. Place in blender along with lemon juice, salt and cayenne pepper. Blend until smooth. With appliance running, slowly & steadily add vegetable oil. Stop machine and scrape down sides as needed; process until creamy & smooth.

Cover tightly and store in refrigerator. Will keep (without discoloration) 5-6 days.

Wednesday, April 21, 2010

What's for Dinner? PIZZA!


Seems like my allergy mom friends are unhappy about pizza lately, while I am loving it over here. When my non-allergy peeps ask me, 'How do you make pizza without cheese?' My flip answer is, 'You just leave off the cheese.' Well, it sounds flip, but it's really kind of true. You just need to pay a bit closer attention to the other ingredients & you're set.

Here's the crust I usually use. I'm not going to say it's the best pizza crust ever (though I'm loving it more each time I have it), but if I spread the batter out really thin, I get 3 pizzas out of the recipe and they're thin enough that the texture is quite good. (The cooking temp was left off the PDF I linked to up there... it's 350F.) Eventually, I'll get around to trying a yeast-based recipe or two but for now this works for us. (And yes, I sub flours all the time...and it always seems to work okay.)

First off, I make sure I use a good sauce. I am not a huge fan of tomato sauce in general but I like (Surprise! What can I say? There's a reason I rep their food, people!) the Wildtree one (Hearty Spaghetti Sauce Blend, but I'm going to try the Scampi blend sometime soon, too, for a tomato-free version)...partly because you can easily customize it to your own tastes. If you get that one, ignore the cooking instructions on the package. Bring to a boil, reduce heat and simmer for about 10 minutes. Then you can cook it as short or long as you want (I usually do at least an additional 10 minutes). The boil/simmer helps the tomatoes to carmelize, which gives the sauce a MUCH better depth of flavor. You'll just need to watch the moisture level, as the simmering can thicken it up pretty quickly. Oh, and I usually use canned tomato sauce rather than stewed tomatoes because I like the texture better. Use whatever works for you.


Now, what about toppings? I'm sure you have some favorites & those will probably be fine here as well, unless you're a one-topping type and then I'm thinking you might want to branch out a bit. ;)

A few of my favorite combos:
-- ground beef, spinach, tomato, garlic (or leave off the beef and add basil for a fabulous veggie version)
-- turkey sausage, ham, sauteed spinach & onion, pineapple, olives or olive tapenade
-- turkey sausage, sun-dried tomato, olives, spinach


Since there's no cheese, I usually drizzle on some grapeseed oil (flavored oils work great for this) or extra virgin olive oil--after baking, so it doesn't all soak in--both for flavor and mouth feel. You could also add a bit of balsamic vinegar on top, if that strikes your fancy. I also once used Karina's Best Cheesy Uncheese Sauce and, while it didn't fool me into thinking there was cheese on my pizza, it wasn't bad. (My subs to the Uncheese Sauce: other wheat-free flour, oat milk. I added the mustard but then decided I'll leave it out next time...flavor was too overpowering. And we are seed-free, so no tahini. And it was still pretty good.)

My kids LOVE pizza. Even the cheese eaters in the household like these versions a lot and my picky eater has even started requesting his pizza without cheese. Now that's an endorsement. :)

**I've recently discovered that Daiya fake cheese is safe for my little guy so we have added that to our pizzas now. I do like it better than w/o any cheese at all but pizza seriously was a fave even before that. (We've only had it once so far with the Daiya, if that means anything to you.)

Monday, April 19, 2010

Microwave Potato Chips? Really?

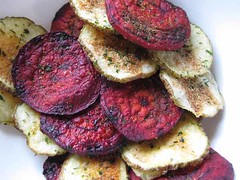
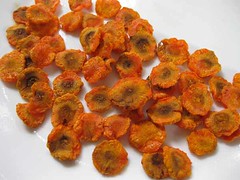
I loooove sweet potato chips. I'd eat them all the time except they're kind of a pain to make. Or so I thought. And those fancy veggie chips are so spendy, plus there's the whole issue about unsafe ingredients. But that doesn't bother me anymore, 'cause I just learned that I can make delicious veggie chips in my microwave! :)

I feel silly even posting a recipe because this is so incredibly easy. (I feel even more silly that I didn't know about this before!)


Microwave Veggie Chips
vegetable of choice
1-2 tsp oil of choice (I've tried grapeseed* & olive, both worked great)
salt or other seasoning, to taste

Slice veggie into thin slices. (In my experience, disc-shaped veggies cook the most evenly. However, carrots are so tiny in discs that I'm going to try them sliced lengthwise.) You can use a mandolin slicer or slice them by hand. Leave skin on or peel it off... your choice. (I'd definitely peel non-organic root vegetables.)

Put veg slices into bowl and toss with oil. (*Garlic & jalapeno grapeseed oils were very yummy. I use the Wildtree oils, so I'll definitely be trying all of those--plus spice blends since I have a cabinet full of them--favorites so far are Scampi and Cajun.)

Add salt or other spices, as desired.


Arrange veggies in a single layer on a parchment paper-lined microwave-safe dish or an oiled dish. Cook on high until veggies start to brown, turning them over around halfway through cooking time; time will depend on thickness of slices. Allow to cool/crisp. Serve. (Not sure how they'd store, as I've not made enough at once that storing was an issue. In other words, I eat them pretty much as fast as I can cook them; they go even faster if I share.)

I made super-thin slices using just a potato peeler...those took about 5 minutes to cook. When I did hand-cut slices that were about as thin as I could make them that way (I'm no chef) it took about 11 minutes, and they were just a tad overcooked. My mandolin slicer cuts them a tad thicker than that. You'll need to play with the timing. Once they start to brown they seem to brown pretty quickly so you'll want to watch closely.


My preschooler flat-out refused to try these for a while (his pickiness is becoming the stuff of legend around our house) but as soon as I bribed convinced him to try them, he was asking for more. :)

Okay, now go get your chip on!

Tuesday, March 16, 2010

What's for Dinner? Turkey Tenders

Last time I tried to make nuggets I used a 'just like McDonald's' nugget recipe. Well, I'm not a fan of those but my kids usually like that junk so I figured it was worth a shot. No go. I don't know if it was my choice of flour sub (buckwheat & something, IIRC) or what but DS1 would barely touch those things.

Because I'm a glutton for punishment, I thought I'd try again and just be careful about the flour. I looked at a few recipes and then (largely because I didn't want to take the time to go fire up the other computer so I could print out a recipe) I made one up on the fly.

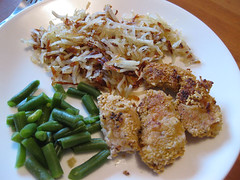
Here we go...I'm pretty sure this would work for anything you might want to eat a 'tender' of. Since chicken's a no-go for Ponyo, I used turkey. The quantities shown here fed me and the two boys, with 2 tenders left.

Turkey Tenders
2 turkey tenderloins, cut into wide strips
2 cups Chex cereal of choice, crushed (you might want to add just a tad of safe flour for better sticking, unless your crumbs are really tiny)
2 tsp California Garlic Pepper Blend (or other combination of spices to taste)
EnerG egg replacer to equal 2 eggs
1/2 cup safe flour (I used masa)

Put out three bowls: one for flour, one for egg sub, one for Chex cereal. Coat turkey tenders lightly with flour. Dip into egg sub and then into Chex crumbs, making sure the tenders are well coated. Handle tenders carefully so coating doesn't fall off.

Cook in a skillet over medium heat until golden brown and turkey is cooked through. Serve with your choice of dips, over pasta, whatever strikes your fancy!


Now, neither boy was a big fan of this until I gave them some dip. Then Wee Laddie ate three tenders (that's pretty good for him) and the Sprog at at least three. Nobody but me ate the green beans, but I keep trying. ;)

Sunday, February 28, 2010

Hello, (Chocolate) Cupcake!

I am not a baker. I can make a pretty yummy (and easy) quiche but fat lot of good that does me now, eh?

The thing is, I have kids now. And they have food allergies. AND they go to birthday parties where other people eat cake & cupcakes & things that look yummy. Things my kids want to eat. And those parties don't usually have those treats in a top 8-free version. So bake I must.

Those of you who know me from other forums (TKWFA, mostly) know that I have a GF baking 'crush' (if you will) on Karina, the Gluten-Free Goddess. I have only made a few of her recipes but I very much admire her a) writing, b) ability to create/convert a kick-ass GF (at the very least) recipe, c) the fact that she has some recipes I can use without making ANY substitutions, and d) she's given me the closest thing I've had to cheese in almost 2 years. That's almost love, baby.

Normally, when I have to make changes to a recipe I go ahead & modify the instructions and all so that I can post it here in its entirety without infringing on anyone's intellectual property. But I only made one tiny substitution to each of these recipes so I'll just link you to them on Karina's own blog. Look around, make yourself at home. She's not top 8-free but odds are you'll find some stuff there you can convert for your family without too much trouble.

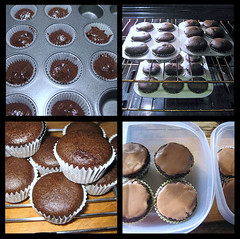
I've made these cupcakes twice now, close enough together that I only needed one batch of frosting (I'm a light froster). I'm putting them on my short list of go-to cupcake recipes. My toddler liked them better the first time but now turns them down. I wonder if they're too strong for him...they do have a bit of a dark chocolate flavor to them. My sugar-loving, carb-junkie preschooler, on the other hand, would probably eat them all day long if I'd let him. And I'm not sure why but the recipe seems to give me quite a few more cupcakes than it's supposed to. Am I being stingy on cupcake height? Don't know. Like I said, I'm not really a baker...which should be reassuring, since these cupcakes turned out pretty well for me. :)

So without further ado, the GF Vegan Chocolate Cupcake recipe. The only thing I substituted was that I used oat milk in place of the coffee. My preschooler isn't so hot on the java yet. ;)


And the Vegan Coffee Icing recipe (just scroll down from the cupcake recipe). Again I subbed oat milk for coffee. I think I made mine a bit too thin (way thinner than Karina did, as you'll see) but I didn't want to thicken it as I was worried the powdered sugar flavor would take over. Honestly, I found it a tad strong already.


On a side note, I'm thinking the chocolate cupcakes would be divine with Karina's Vegan Orange Creme Icing. The orange creme cupcakes, by the way, were my last attempt at cupcakes and I thought the flavor was amazing, but I underbaked them. And my palm shortening was apparently past its prime so it never got creamy (ick...small globs of it stayed, well, globby). Those will be my next cupcakes and I'll post more then...if they're as good as I suspect they will be once properly baked.

Sunday, November 22, 2009

All-Purpose Gravy

This recipe can be made ahead and even frozen.

1 small carrot (about 1/2 cup) peeled and chopped into 1/2" pieces
1 small rib celery (about 1/2 cup) peeled and chopped into 1/2" pieces
1 small onion (about 1/2 cup) peeled and chopped into 1/2" pieces
3 Tbs unsalted butter or shortening
1/4 cup safe flour
4 cups safe chicken/beef/vegetable broth (may be combined as desired, to taste)
1 bay leaf
1/4 tsp dried thyme
5 whole black peppercorns
salt and pepper to taste

Use food processor to chop carrot, celery and onion into 1/8-inch pieces (about five one-second pulses) or chop by hand.

Heat butter/shortening over med-high heat in large saucepan with heavy bottom. Once butter/shortening stops foaming, add vegetables. Cook, stirring frequently, about 7 minutes or until well-browned and soft. Reduce heat to medium. Stir in flour and cook, stirring constantly, about 5 minutes or until fragrant and thoroughly browned. This is what is commonly referred to as a roux.

Whisking constantly, gradually add broths to the roux. Bring gravy to a boil, skimming foam frequently. Lower heat to med-low; add bay leaf, thyme and peppercorns. Simmer 20- 25 minutes until gravy is thick and has reduced to about 3 cups, stirring occasionally.

Strain gravy through fine-mesh strainer into clean saucepan, pressing on solids to extract as much liquid as possible; discard solids. Add salt and pepper to taste.

Use a Dutch oven to double the recipe; you'll need the extra space to brown all of the vegetables. Cook times will also need to be increased by about 50 percent.

You can freeze the gravy for later use. To thaw: Heat gravy plus 1 Tbs of water over low heat in a large saucepan. Bring slowly to a simmer; then whisk to recombine gravy and restore smooth texture.

modified from this recipe for Make-Ahead Gravy

Saturday, November 21, 2009

Grammie's Blueberry Cobbler


contributed by Ann Marie Baribeault Sokos

3 cups blueberries
2 Tbs lemon juice
2/3 c packed brown sugar
1/2 c rice flour
scant tsp of xanthan gum or guar gum
1/2 c quick oats
1/3 c softened butter/shortening
3/4 tsp cinnamon

Preheat oven to 375°F.

Place blueberries in ungreased 8x8 pan. Sprinkle blueberries with lemon juice.

Mix dry ingredients with softened butter in separate bowl. Place on top of blueberries.

Bake for about 30 minutes.

Ann says:
My grandmother helped me make this recipe up for Megan this summer while visiting. I imagine you could use any berry or maybe even peaches and apples.


My notes:
Because we don't do rice here, I subbed oat flour since it already had an oaty flavor going. And I used palm oil shortening (I usually add a bit of salt to help mimic the flavor of butter) in place of the butter.

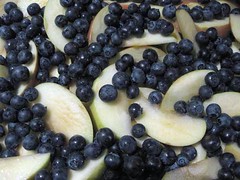
I made this (with apples & blueberries) for Thanksgiving dinner at a friend's house. I am delighted to report that this vanished completely, to raves. The bakery pumpkin pie went to leftovers. Thanks, Ann!

Thursday, November 19, 2009

Squash-Buckwheat Pancakes


3/4 c buckwheat flour (or other safe flour)
1/4 c tapioca starch (or other safe starch/flour)
2 tsp baking powder
1 Tbs sugar
1 tsp pumpkin pie spice (or sub in spices to taste: cinnamon, nutmeg, allspice, etc.)
2/3 c squash puree (I used the baby food kind 'cause we have lots of it)
add water to squash to equal 1 cup water, may need add'l water depending on thickness of squash puree

Mix dry ingredients in bowl. Mix squash puree and water thoroughly. Add to dry mix and stir well. If batter is too thick, add water to desired consistency.

Cook in lightly oiled skillet over medium heat. Turn pancakes when bubbles pop and leave a hole. Cook until golden brown.

Serve with desired toppings. I tried honey and strawberry jelly...both were good but the jelly flavor was a bit overpowering.

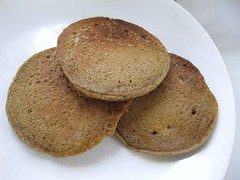
Subtle flavor in these. Very good pancake texture (not a weird GF concoction) and I liked having some veggies in there for added goodness. I'll be making this again, for sure.

Sunday, November 15, 2009

Cream of Mushroom Soup, v. 1

I was going to post a Green Bean Casserole Cook-off Challenge for Thanksgiving. But it's just over a week away (!), which seems not nearly enough time. So I'll post a few versions & you can all just pick whichever one looks the most promising for your family. Or have your own cook-off & post your results in the comments! :)


I came across this recipe, and it seemed like it'd work for my family without too many subs. And I had pretty much everything on-hand...huge plus.

You can sub this in for just the soup in the traditional green bean casserole recipe or you can replace the whole recipe, depending on your needs.

Cream of Mushroom Soup
EVOO or GSO, for sauteing
1 lb mushrooms of choice (I thought this was about 2x the necessary amount but it tasted good...just too lumpy for my own preferences)
6 Tbs butter or sub (I used palm oil shortening. Might be able to sub in oil as well.)
2 c chicken/vegetable broth
2 c whole milk (or other safe milk...I used oat)
6 Tbs safe flour (sweet/brown rice flour recommended in original recipe, but I used potato starch just for fun. See notes below.)
1 tsp dry mustard
1/2 tsp garlic powder
dash cayenne pepper (optional, for a bit of a kick)
salt & pepper, to taste

Saute mushrooms in olive or grapeseed oil and set aside.

Melt butter or butter sub in a large saucepan. After butter has started to bubble, add flour to make a roux. Then add spices. (Feel free to tweak the spices in this recipe to suit your tastes.) Once the roux has cooked/bubbled for a few minutes, add milk and broth. Whisk over medium heat until the sauce thickens.

Once the sauce has thickened to desired consistency, add the sauteed mushrooms. Serve hot or use for green bean casserole.

My notes:
When I added the potato starch, I thought I had ruined the soup. It didn't mix in well and seemed stiff and sticky and I was pretty sure it was going to permanently bond to the saucepan. Kept going anyway. (I'm a little stubborn like that, sometimes.) Took quite a bit of whisking, but I finally got it to sort of blend and it did actually thicken like it should when the oat milk & broth went in. Yay!

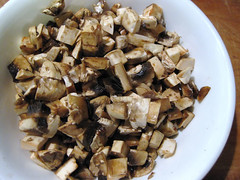
I was making this while also making that night's dinner so I 1) am lacking pictures aside from the sauteed mushrooms (hopefully will add some next time I make it) and 2) stuck it in the fridge and ate it the next night instead of eating it fresh OR using it in casserole. Since I just had mouth surgery and still cannot chew, I also stuck it into the blender and smoothed out all the mushroom lumps.

If you like mushrooms, you'll probably really like this recipe as is. I like mushroom flavor but the texture skeeves me out. So the blending thing worked out great for me and I really enjoyed the smoooth, mushroomy-tasting soup. I find most canned mushroom soups a bit bland, so this was a nice change. Not strong at all (bring on the picky kids/husbands!) but a richer, deeper flavor than you might be used to. When (yes, when) I make this again, I think I'll leave a few small mushroom pieces out of the blending to be added in at the end.

Saturday, November 14, 2009

Top 8-Free Muffins/Bread

It has come to my attention that there are some folks out there who are reallyreallyreally missing bread products. You just think they'll always be there for you and then all of a sudden, WHAMMO! Food allergies. Or Celiac Disease. Ugh.

This is a very flexible recipe for muffins/bread. The bread won't quite stick together well enough for a regular sandwich but I do like to use it for grilled sandwiches. The grilling kind of holds it together and then I use a fork to eat it so it's all good.

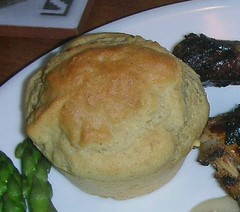
The prep on this is quite fast... maybe 10 minutes. (I'm slow.) And here's what one looked for a Thanksgiving dinner.


GF Muffins
1 cup rice flour
1 cup garbanzo bean flour
1 heaping tsp baking powder
1 tsp xanthan gum or about 1/2 tsp guar gum
1 tsp baking soda
1/2 tsp salt
1/3 cup oil (I usually use grapeseed but have also used olive)
2 eggs/egg sub (I use 1/2 cup applesauce. I suspect flax goo would be better, but it's an allergen at our house.)
1 cup rice milk (I use oat milk)

And here are flour subs I've tried. We are rice-free.

Blend #1: Bob's Red Mill GF all-purpose flour.
Didn't really like this one. The beany flavor was way too strong for me.

Blend #2: This blend was pretty good, with just a tiny bit of sweetness to it.
1/4 cup tapioca starch
1/4 cup sweet white sorghum flour
1 cup oat flour
1/2 cup buckwheat flour

Blend #3: I also liked this one but maybe not quite as well.
1 cup oat flour
1 cup buckwheat flour

Combine dry ingredients in one bowl and wet in another; mix each separately first. Combine wet ingredients with dry. Stir until well blended.

Add herbs/spices if you want...garlic, rosemary, basil, etc. I think it would be good with olive oil, rosemary and olives.

MUFFINS: Spoon mixture into muffin cups, bake at 350°F for 16-20 minutes.
BISCUITS: Drop batter directly onto cookie sheet, bake at 350°F for 16-20 minutes. These aren't very biscuity, really, I'd use the 'Buttermilk' Biscuit recipe instead.
BREAD: Pour mixture into greased bread pan, bake at 350°F for ?? (I didn't write down the timing...I'd try 40 minutes to start & go from there.)

In general, my feeling on this recipe is that you can use almost any combination of flours and you'll have a pretty reasonable muffin/bread. I will continue to play with this, as I think a person could come up with some really fabulous combinations. I look forward to hearing what you, friends/readers, come up with!

Tuesday, November 10, 2009

'Buttermilk' Biscuits

Top 8-free biscuits!! (maybe corn-free, too?)

I have been using this other recipe for top 8-free ‘biscuits.’ And although they’re pretty good, they’re much more muffin than biscuit. Which is fine, if you’re not so much in the mood for a biscuit. However. I’ve been on a restricted diet for about a year and a half now. My husband and sons go out for breakfast together each weekend day, usually to Burger King. And the leftovers they often bring home… those delicious, evil biscuits. I don’t usually see them so it’s no biggie, and I’m not even really a bread junkie. But, you know, it’s been a looooong time since I’ve had a biscuit. And it makes me crazy when I have to reheat them for my preschooler (who is really now capable of running the microwave himself, thankfully) and I have to smell the yummy egg-cheese-buttery-biscuity goodness that I can’t even sneak a tiny taste of or the baby will be up (screaming) that night.

As of today, I can have biscuits that are like biscuits!

Ohmygod. They were so yummy, it took all of my willpower to not just sit & eat the whole batch all in one sitting. I am not joking. And the ‘baby’ (he’s 21 months now so I should probably refer to him as the toddler) loved them, too. He kept pointing to where they were on the counter and ‘asking’ (he doesn’t talk much but makes little squeaky grunt noises) for them. I’m pleased to say we managed to save some so we can have them again tomorrow! :)

They are not exactly like regular biscuits, of course, but I wholeheartedly believe that this will be an amazing experience for many gluten-free or top 8-free eaters out there. The original recipe was apparently from www.recipezaar.com but I can’t locate it. It was passed along to me and now I’m passing it along to you. Enjoy!
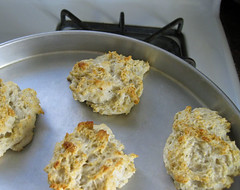


'Buttermilk' Biscuits
1/2 cup potato starch
3/4 cup cornstarch or tapioca starch
1 3/4 tsp xanthan gum or 1 1/4 tsp guar gum
1 Tbs baking powder
1/4 tsp baking soda
1/2 tsp salt
1 Tbs sugar
1/3 cup cold butter/shortening, cut into 1/4-inch pieces or just under 1/4 cup of vegetable oil (These are absolutely divine with dairy-free butter grapeseed oil and I've also enjoyed them with garlic grapeseed oil as well.)
3/4 cup buttermilk (my sub: 3/4 cup oat milk with 2 tsp lemon juice)

Preheat oven to 375°F. Lightly oil a baking sheet or use a baking stone.

Put dry ingredients into the bowl of a food processor. Process with six 1-second pulses. (I used a small-capacity food processor and found that it worked best if I let it run for several seconds all at once instead.)

Distribute butter/shortening or oil evenly over flour mixture. Cover and process with 12 1-second pulses. (See above about small-capacity machine.) Mixture should resemble coarse crumbs.

Pour buttermilk/milk sub evenly over crumb mixture. Process with eight 1-second pulses or until dough becomes a moist clump. The mix will start to rise very quickly at this point, so get it onto the pan as fast as you can.

Use your hands to plop dough onto pan in approximately 6-8 biscuits, handling dough as little as possible. (I believe this would also work well in a lightly greased muffin tin.) Dough will be very sticky.

Bake 10-12 minutes or until lightly browned. (Here at a mile high, I would suggest 15-17 minutes, to make sure the inside gets fully baked. To check for doneness: Insert a toothpick or knife and pull out. Biscuits are done when toothpick/knife comes out clean.)
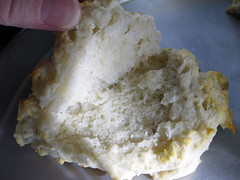


Try not to eat the whole pan all in one sitting. ;)

Update: I've now made these without the food processor (I get so annoyed at having to wash extra items when they're not really needed) and it totally works. They don't seem to rise quite as much but that's a small price to pay for less cleanup, IMO. If you're a biscuit junkie connoisseur (and don't have two small children who are hard-pressed to allow you 5 minutes to yourself in the kitchen), you might evaluate that a different way than I do.

Also, feel free to swap the starches around. I'm sure there are differences depending on which ones you use in what proportions...but I usually just use whichever I have in various proportions and so far all versions have been yummy.

Sunday, October 11, 2009

Orange Spice Cake

This recipe adapts well. We've got an orange allergy in the extended family so we've subbed lemon in for the orange ingredients. You can also try different jams on top. Lemon cake w/raspberry jam, orange cake w/strawberry jam, etc. You can also skip the jam entirely and top with fresh fruit. Lots of options. So far every one I've tried has been a big YUM. I adore this cake.

1 2/3 cups safe all-purpose flour
1 tsp xanthan gum (leave out if using wheat flour)
1/3 cup sugar
1 1/2 tsp baking soda
1 tsp ground ginger
1 tsp ground cinnamon
1/2 tsp ground cloves
1/3 cup orange juice (increase to 1/2 cup for wheat flour)
1 Tbs orange zest
1/2 tsp orange extract
1/2 cup mild molasses, sorghum or rice syrup
1/3 cup oil (increase to 1/2 cup for wheat flour)
1/4 cup applesauce (can sub 1 egg)
1/2 cup orange marmalade

Dress it up:
whipped topping, optional
orange slices, optional

Preheat oven to 350°F. Lightly oil (most cooking sprays contain corn and/or soy) a 9x9" baking pan and set aside.

Combine dry ingredients in a medium bowl. Combine wet ingredients in another bowl; add to dry ingredients. Stir until moistened; pour into pan.

Bake for 16-20 minutes (times may vary for different types of flour). To check for doneness: Insert a toothpick or knife and pull out. Cake is done when toothpick/knife comes out clean.

Spoon marmalade over warm cake. Cool on wire rack.

Dress it up if desired. Serve.